# Review your AWS spend
### AWS Cost Explorer
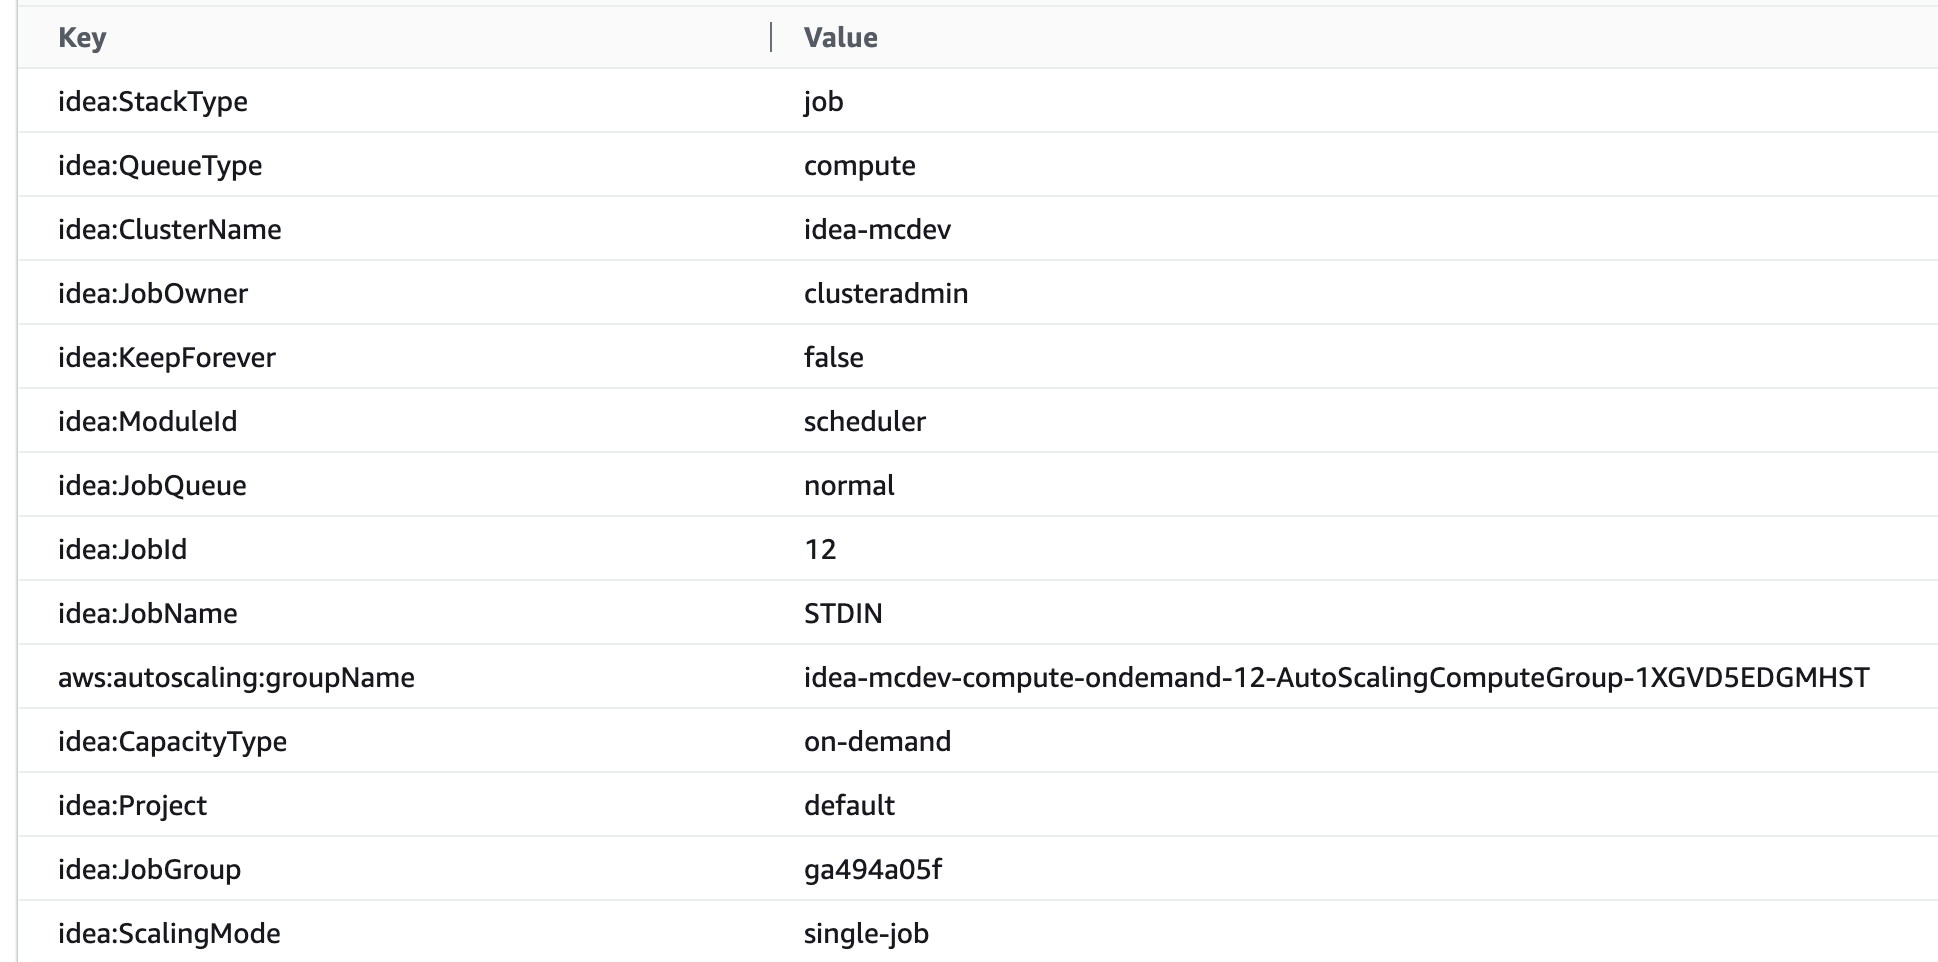
Any EC2 resource launched by IDEA comes with an extensive list of EC2 tags that can be used to get detailed information about your cluster usage. List includes (but not limited to):
* Project Name
* Job Owner
* Job Name
* Job Queue
* Job Id
IDEA automatically assign tags. Custom tags can be added as needed
{% hint style="info" %}
All IDEA generated tags are prefixed with "**idea:**"
{% endhint %}
#### Step1: Enable Cost Allocation Tags
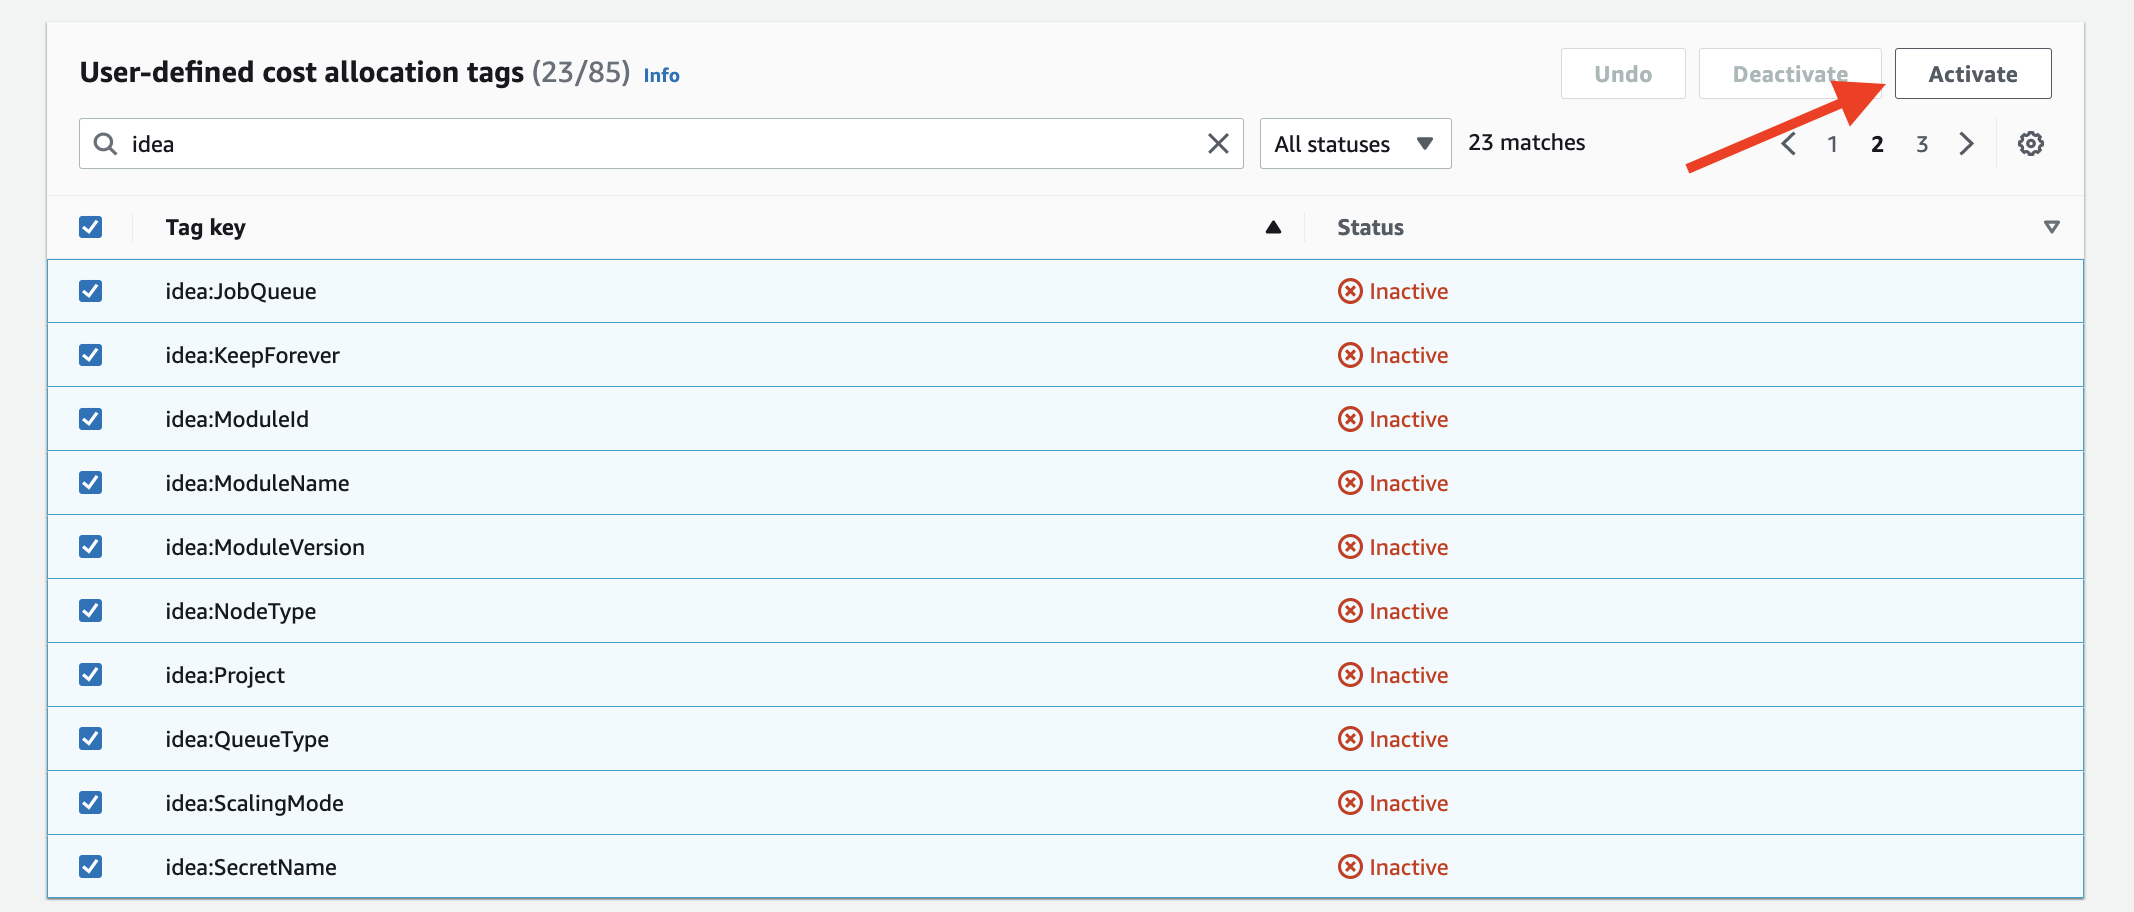
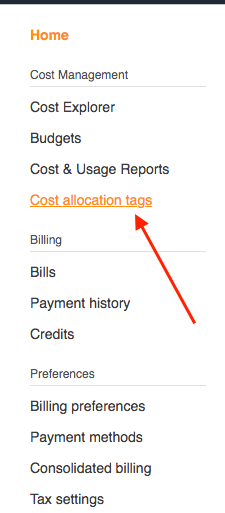
Click on your account name (top right on the screen) then click "**Billing Dashboard**". Once connected to your Billing dashboard, click "**Cost Allocation Tags**" on the left sidebar.
Search all "**idea**" tags then click "Activate". Status of each tag should now be changed to "Active".
Activate all tags to be usable on Cost Explorer
#### Step 2: Query Cost Explorer
{% hint style="info" %}
It could take up to 24 hours for the tags to be visible on Cost Explorer.
{% endhint %}
Access "**AWS Cost Explorer**" service via the EC2 console the click "**Cost Explorer**" on the left sidebar.
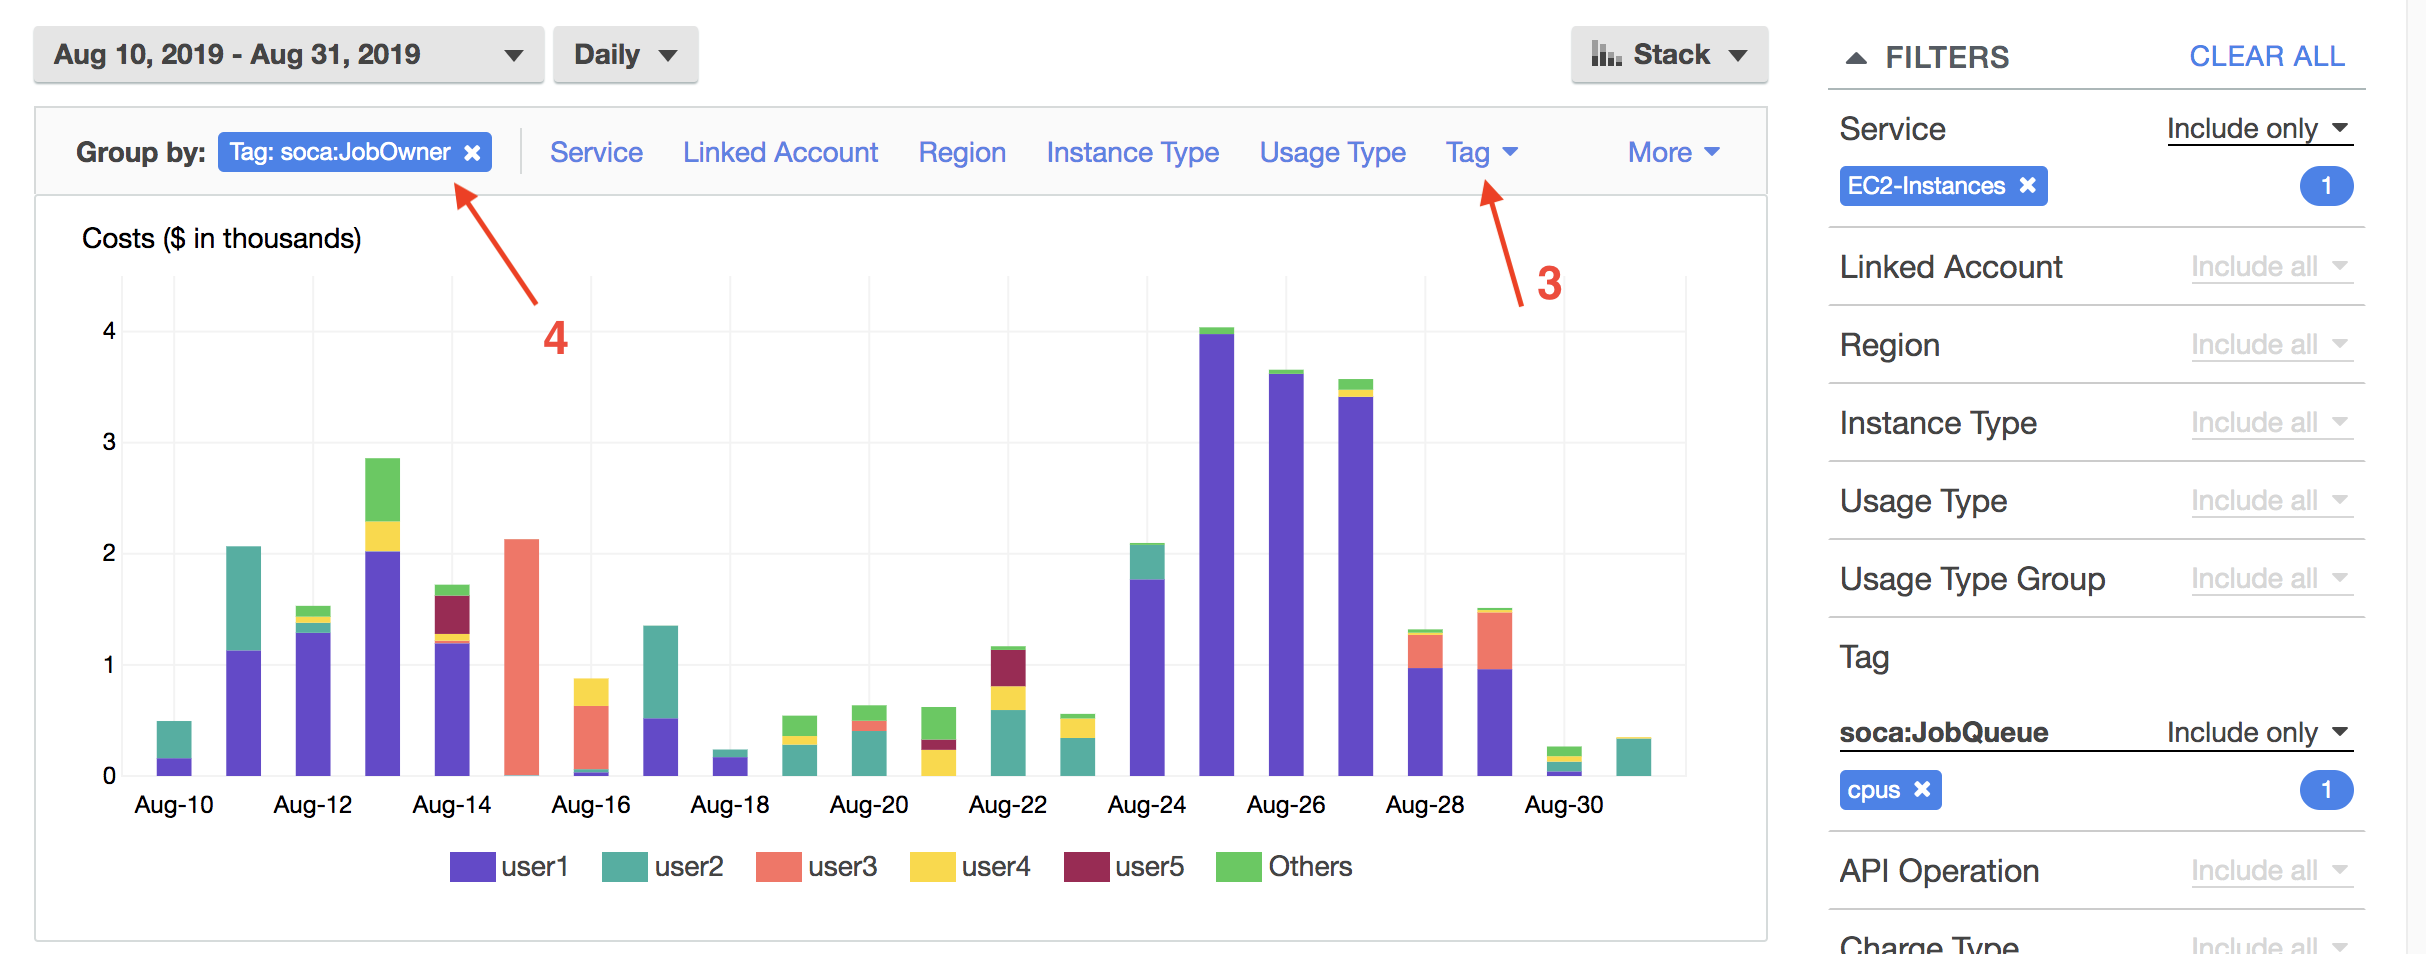
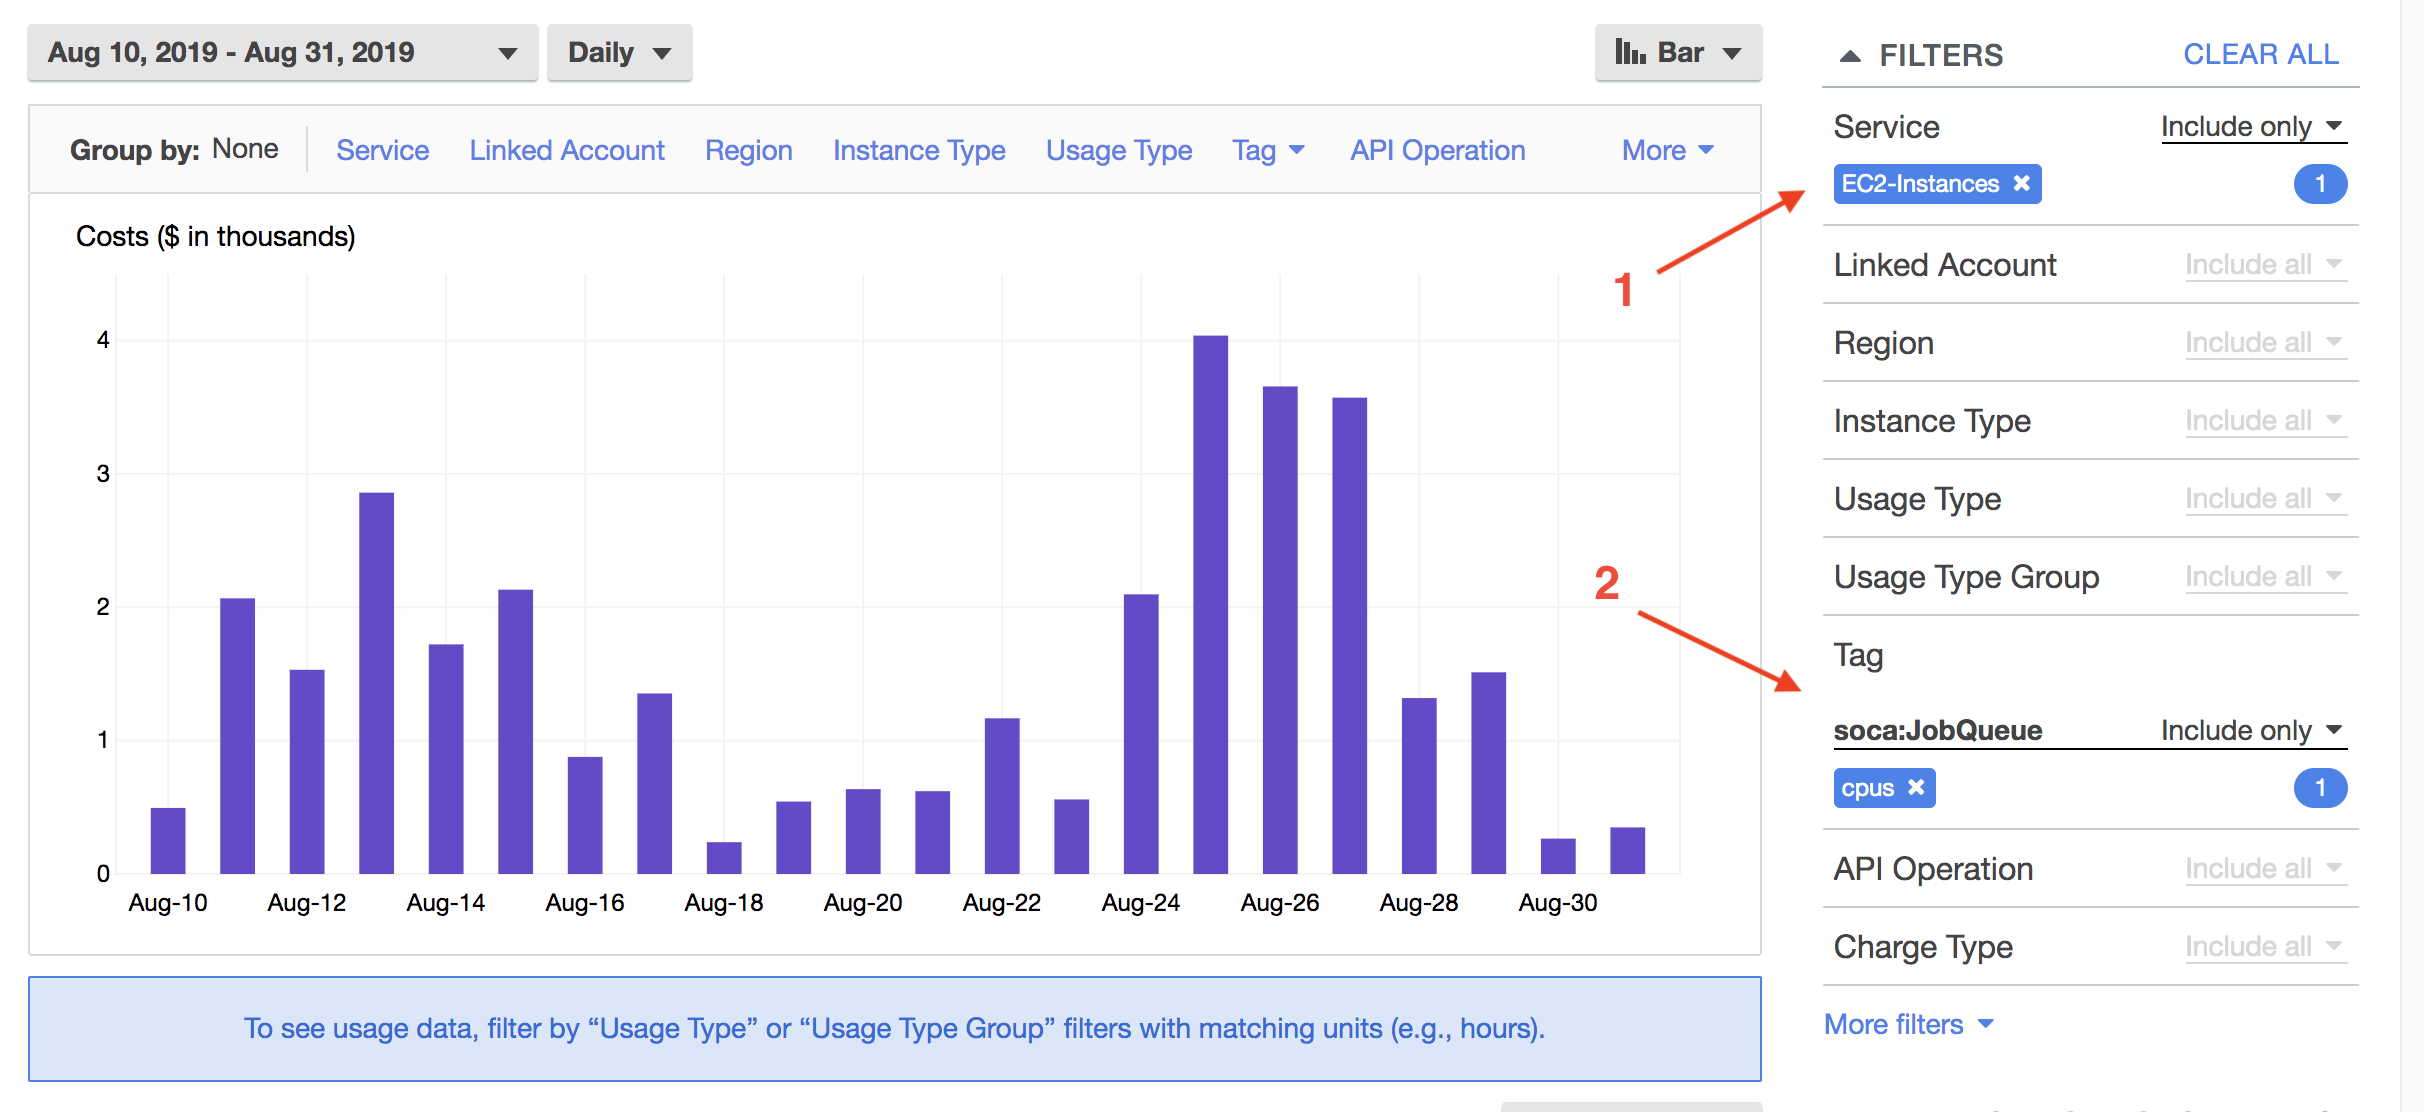
Open your Cost Explorer tab and specify your filters. In this example I want to get the EC2 cost (1), group by day for my queue named "cpus" (2).
To get more detailed information, select 'Group By' and apply additional filters. Here is an example if I want user level information for "cpus" queue Click "Tag" section under "Group By" horizontal label (1) and select "idea:JobOwner" tag. Your graph will automatically be updated with a cost breakdown by users for "cpus" queue